General Information
Canvas and Schoology Users: Getting Started Instructions
Updated August 13th, 2024
Before users can create assignments with materials from the Gallopade Grade Level Course within Canvas or Schoology, users must complete a 3 step process to align their school and classes within the My Courses widget and assign a course to each class. This process must be completed for each course in Canvas or Schoology using the Gallopade Grade Level Content.
After logging into Canvas or Schoology, selecting a course and using the external tool, you will receive a notification message similar to below if you have not completed the 3-step setup process.

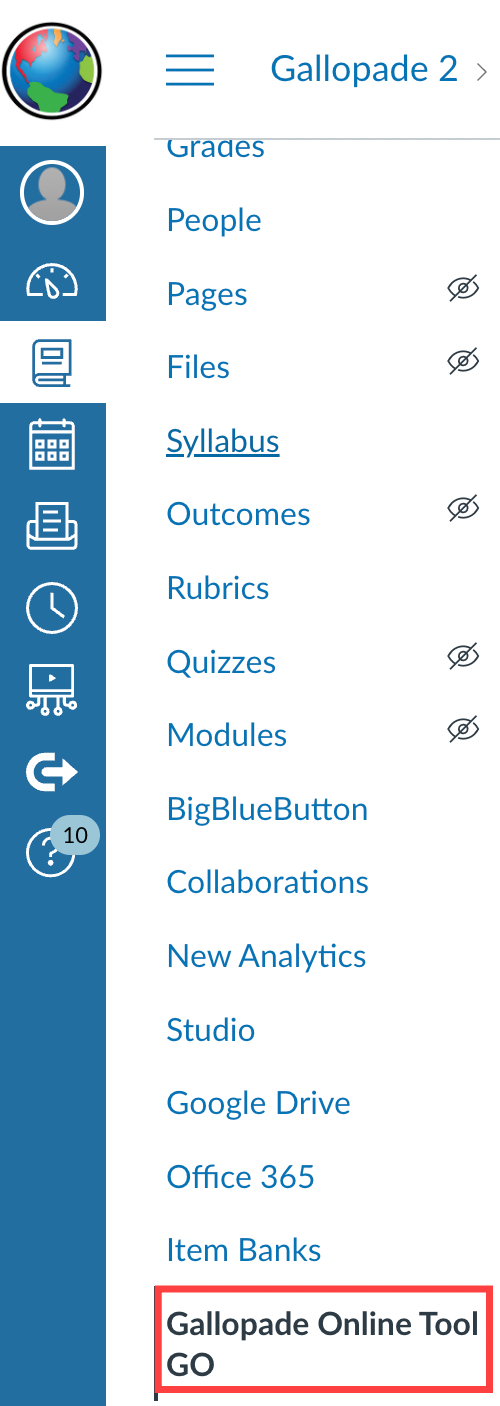
To complete your setup, use the left navigation bar to select the Gallopade External Tool (or the name given to the tool by your district).
Canvas |
Schoology |
 |
 |
You will be redirected to the Gallopade Online Dashboard on the right side of your screen.
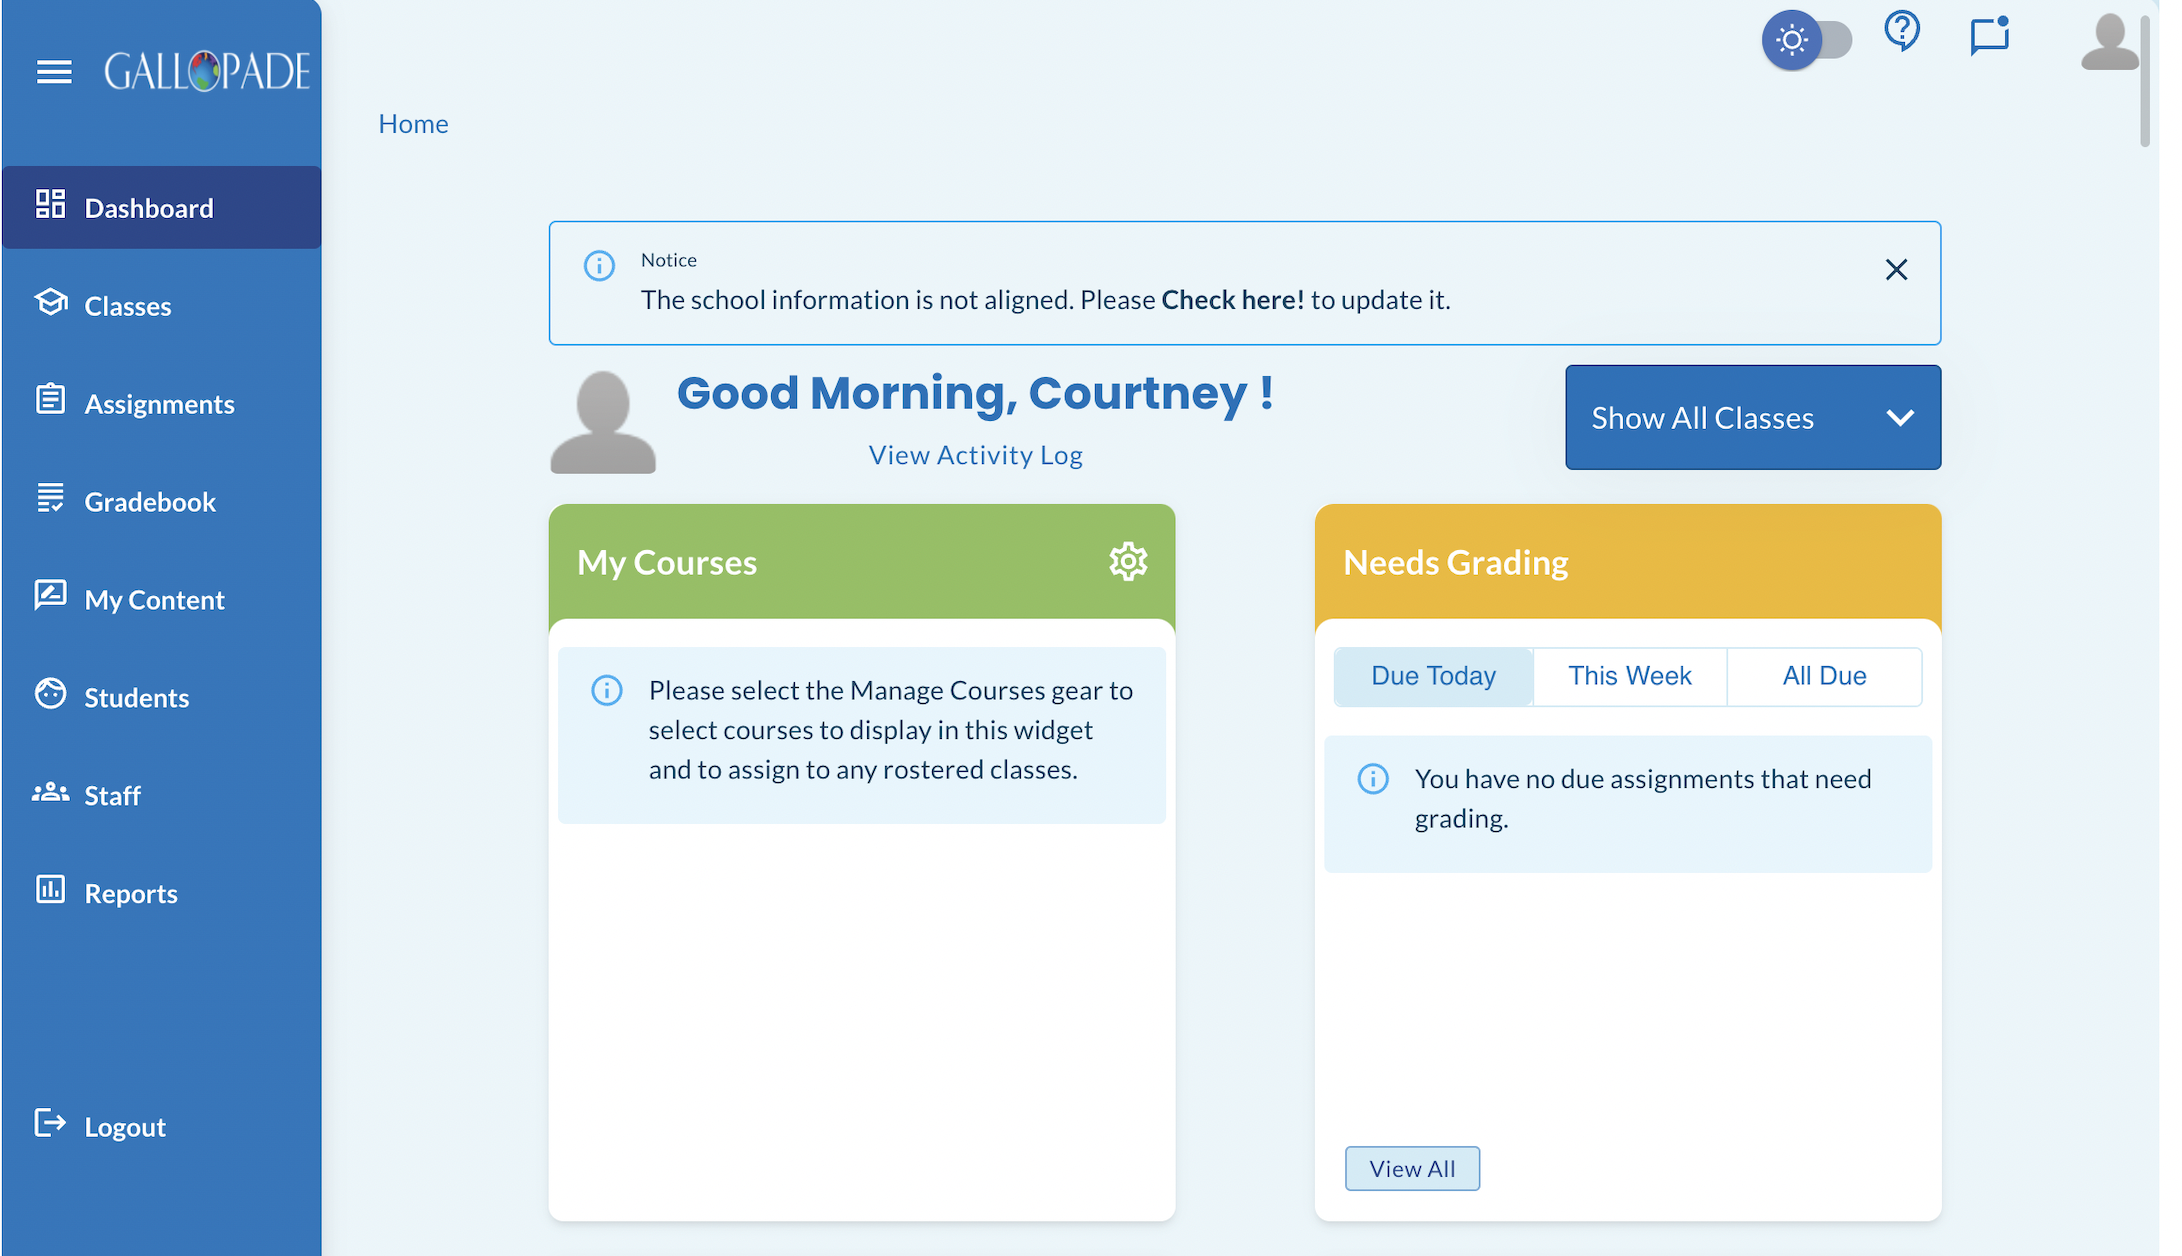
Next, select Check here! in the banner message or select the gear icon  in the green My Courses widget.

This will take you to Step 1: Select School where you'll need to select your District and School.
Step 1 Workflow A: If there is no drop-down listing of LTI Classes and Gallopade Classes, this indicates that your district is rostering through your Canvas/Schoology connection and there is no need to LINK any pre-loaded classes. Simply, make sure a school is selected and click SAVE and proceed to Step 2.

Step 1 Workflow B: If you see a drop-down to “match” LTI classes with Gallopade Classes, this indicates that your district has “pre-rostering” through either Clever or ClassLink. You will need to select from the drop-down of loaded Gallopade Classes to any Class/Course then click the LINK button. You may have more than one class/course to match.

This will add the linked class below. Finally, click SAVE.

Select Next to go to Step 2: Select Courses.
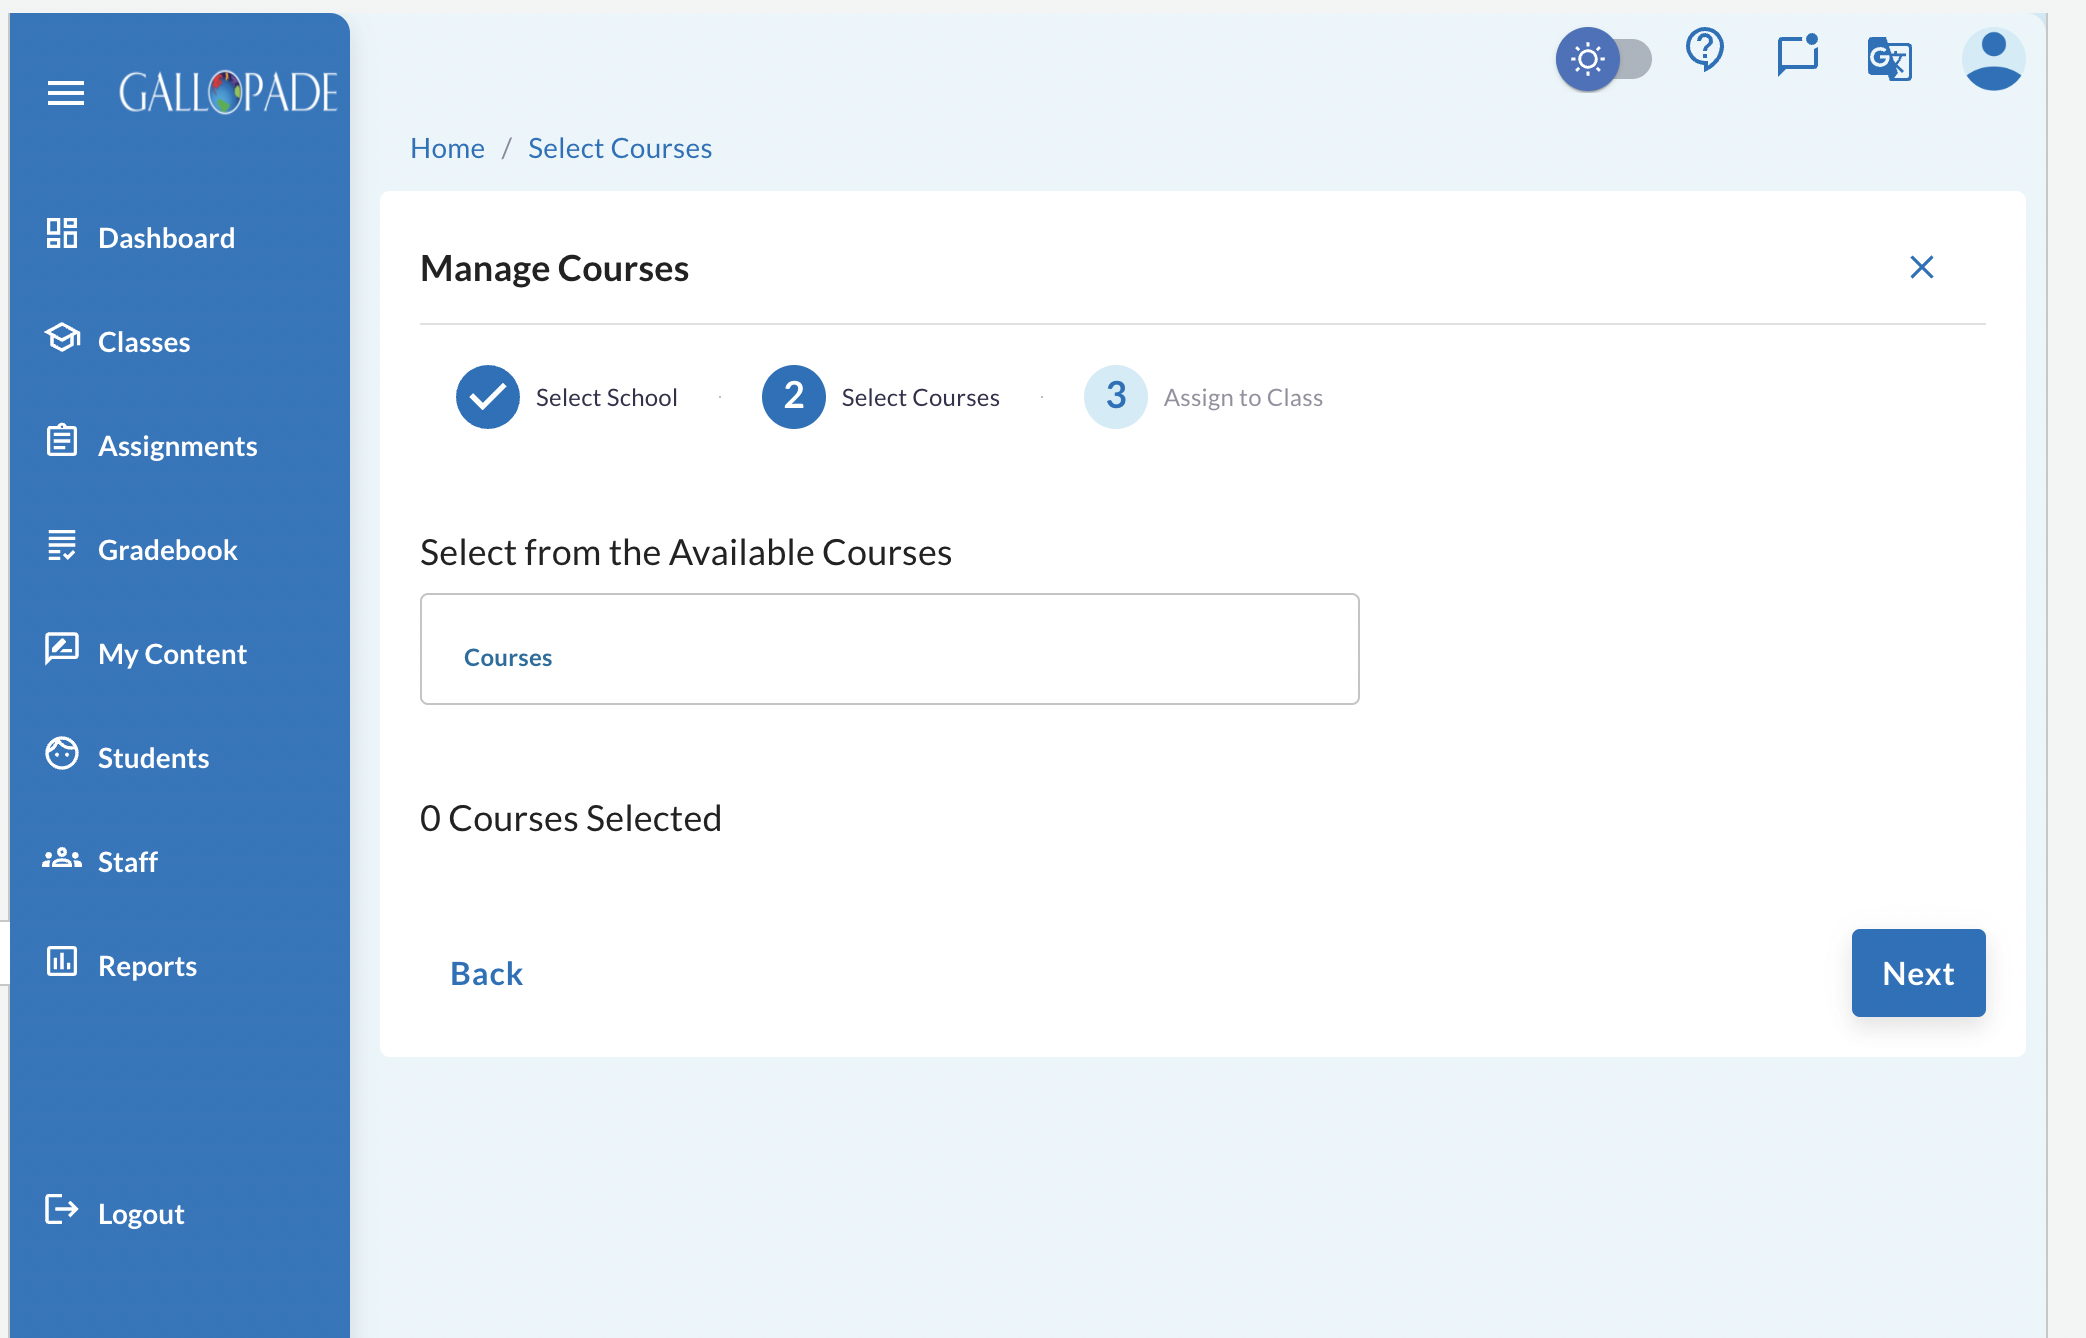
In Step 2, you'll need to select the Available Courses drop down to select the Gallopade Grade Level Course you will use with your class. Select the checkbox to the left of the course title, then select +Add Selected Courses at the bottom right of the list.
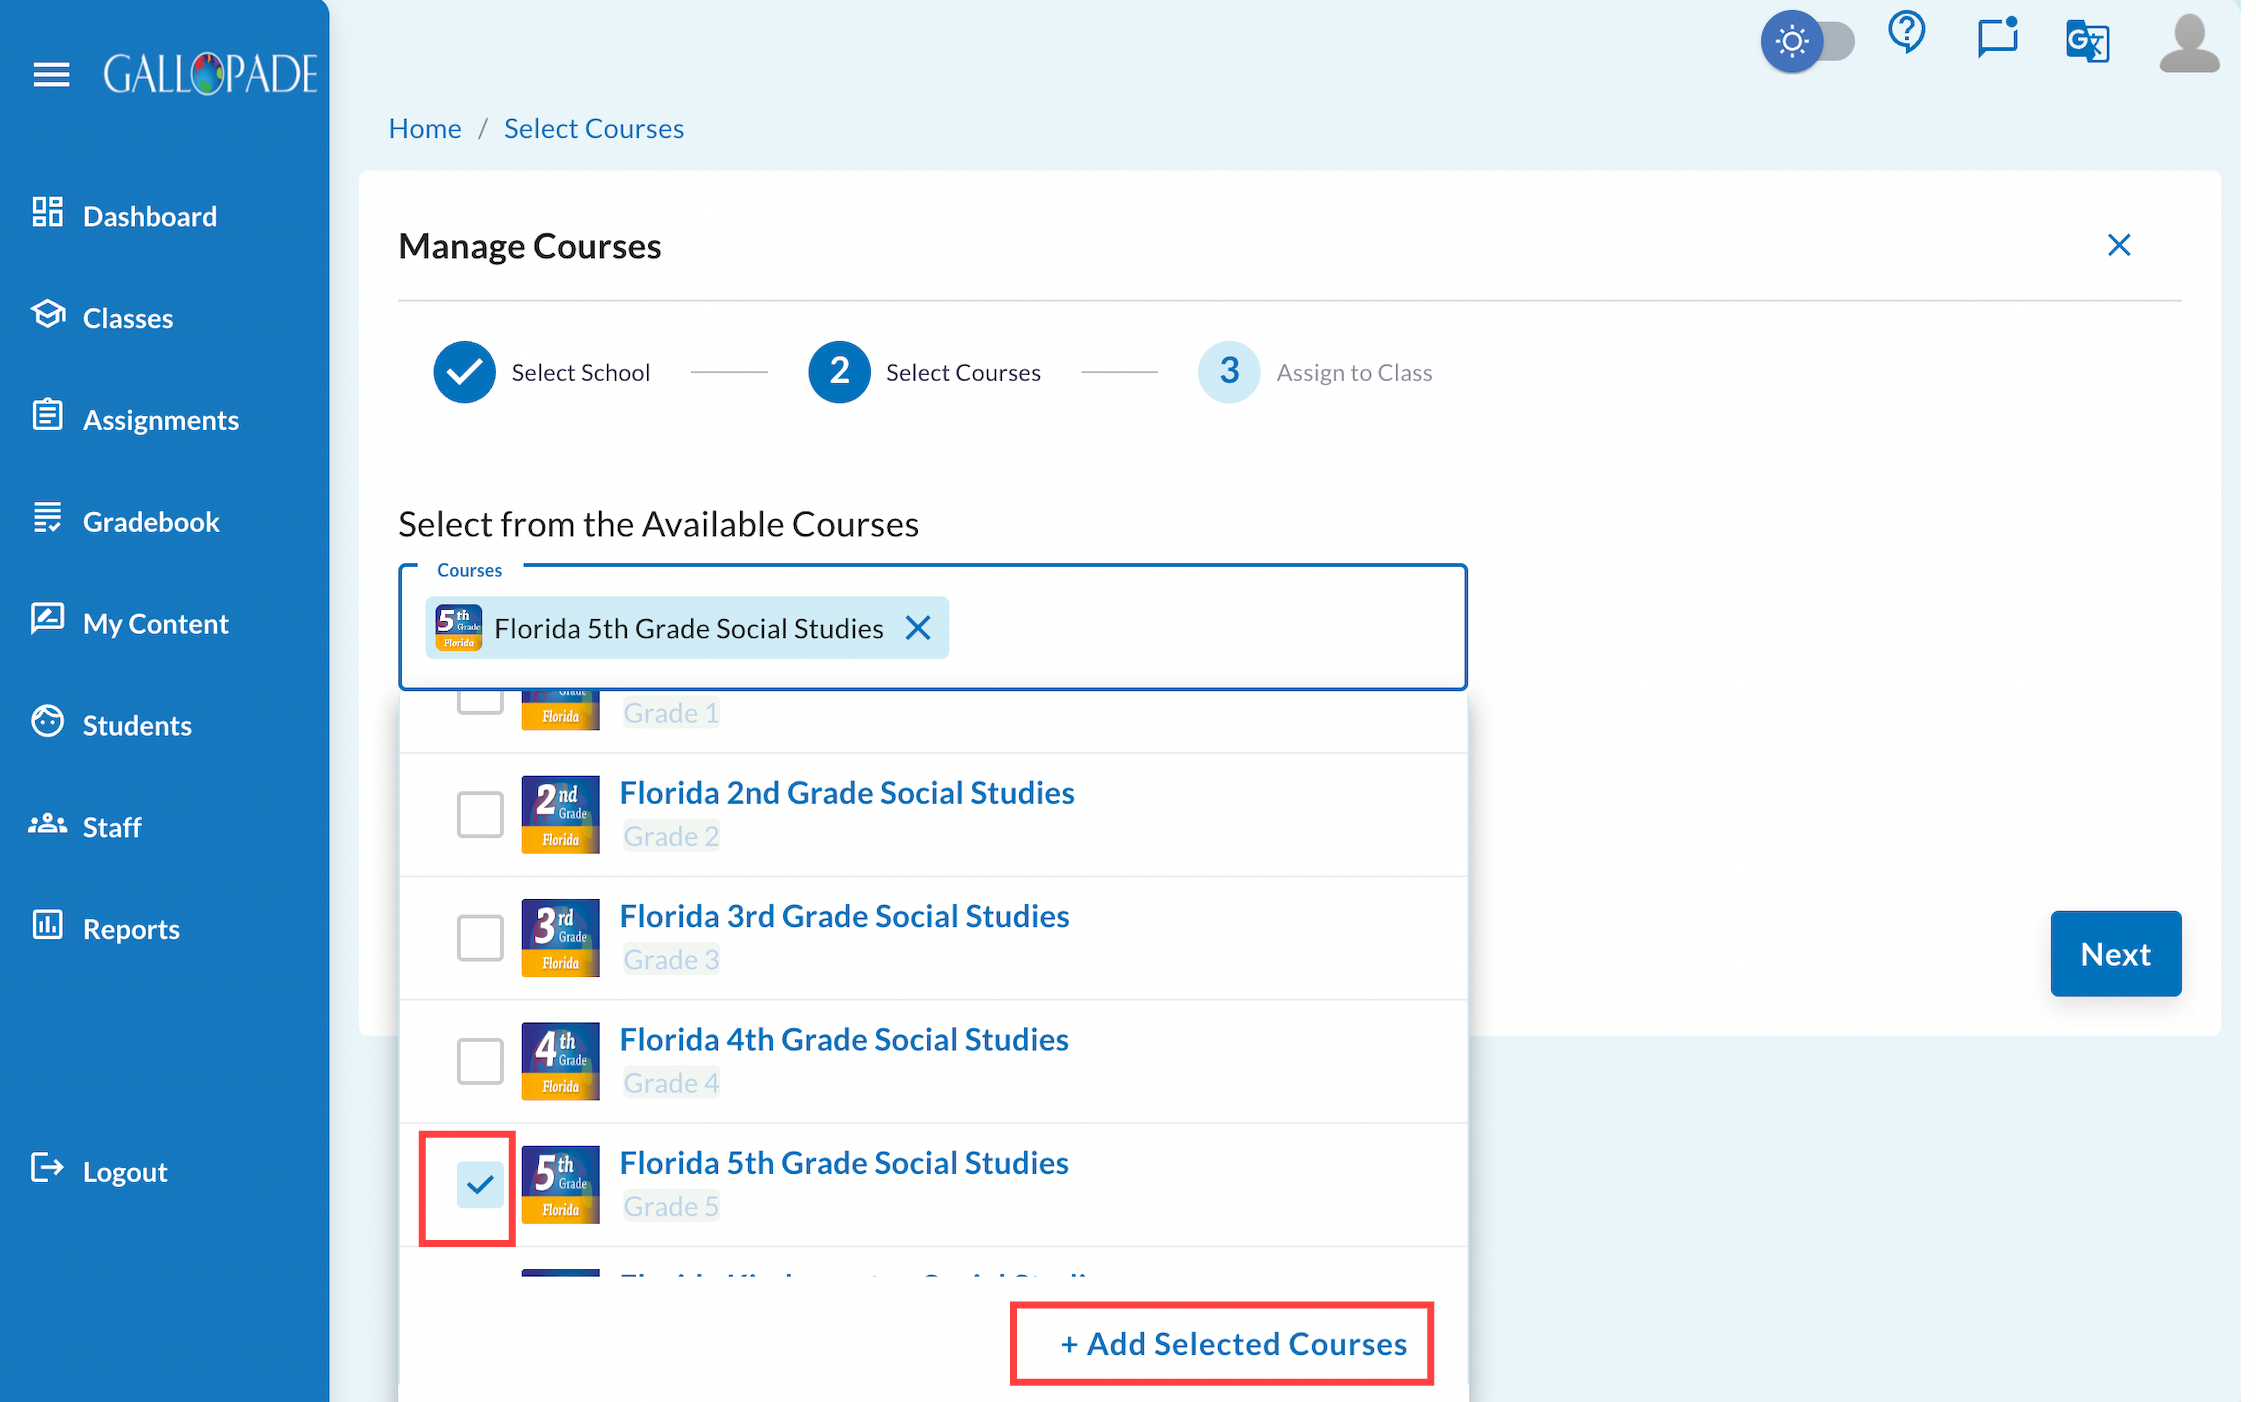

Then select Next to go to Step 3: Assign to Class.
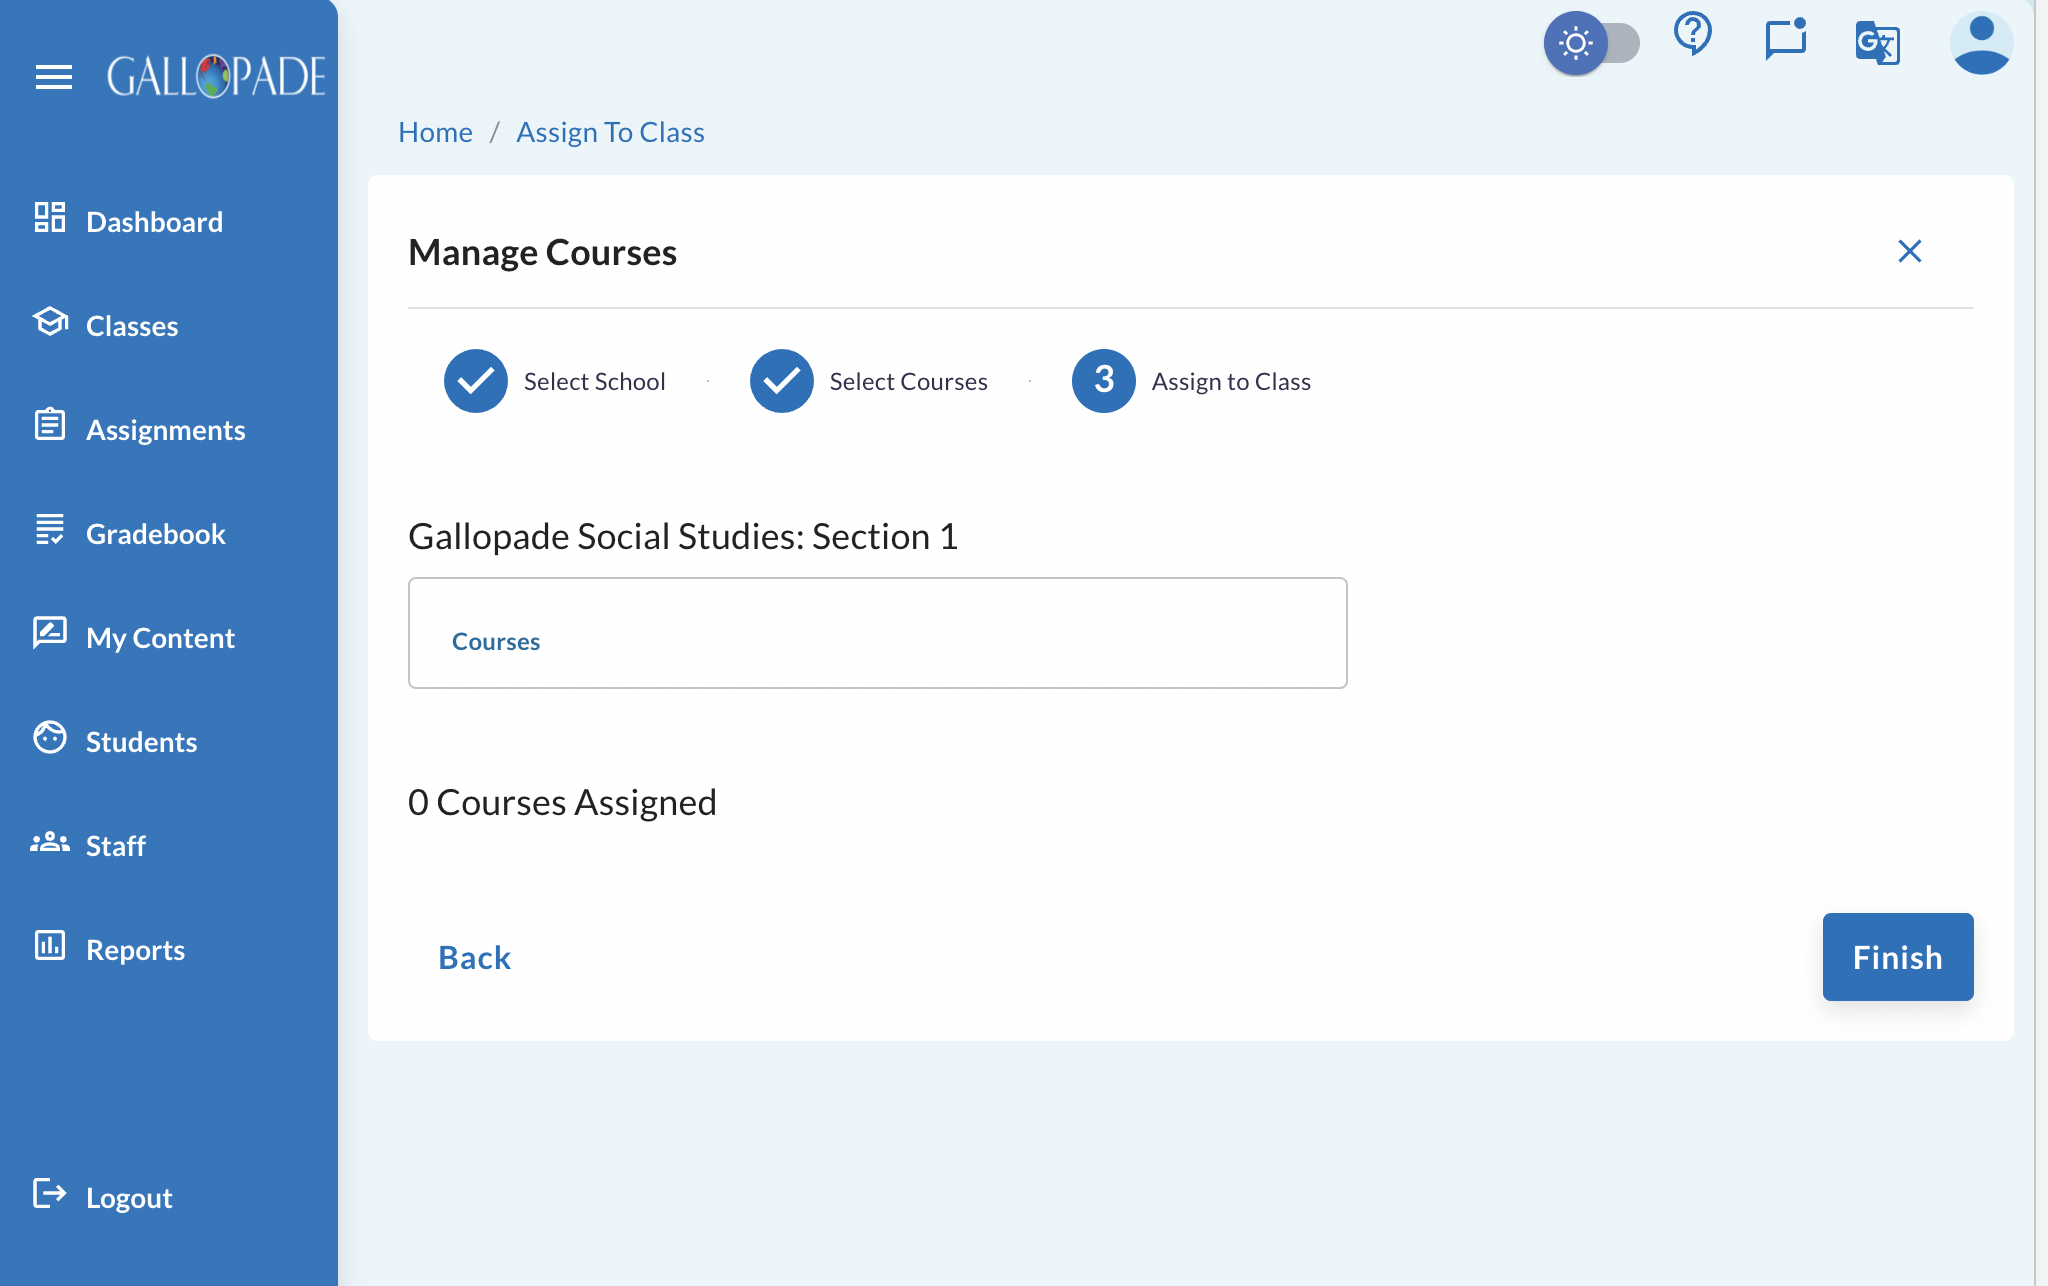
In Step 3, you will see your class listed with a drop down menu. Select the drop down menu to assign the Gallopade Course to the class.

Select the checkbox to the left of the course and select Assign to Class.
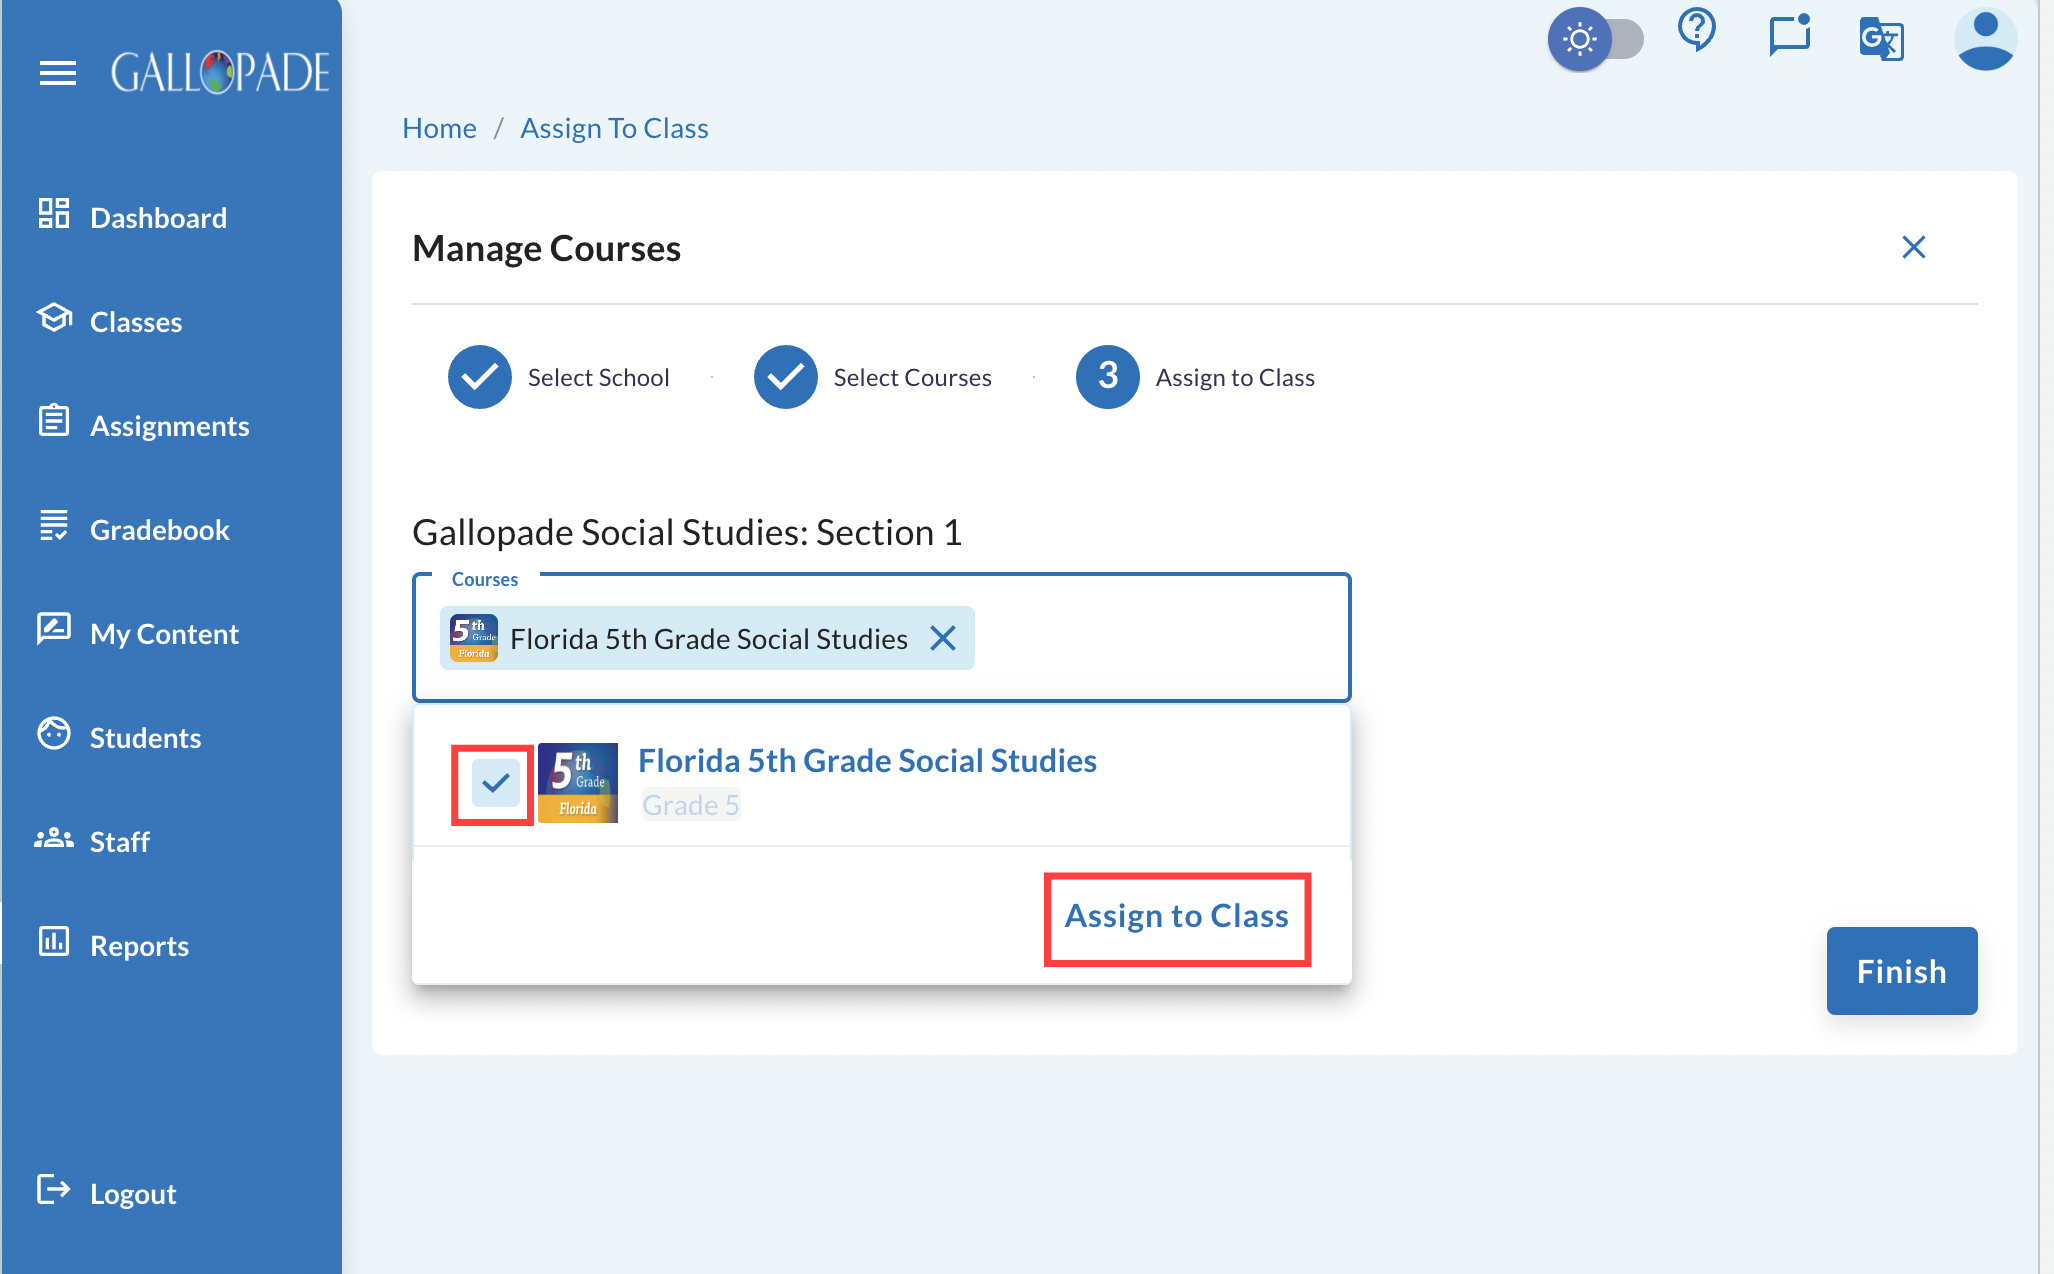

Then select Finish to complete this process.
You'll be redirected to the Gallopade Online Dashboard and the course assigned will appear in the My Courses widget.
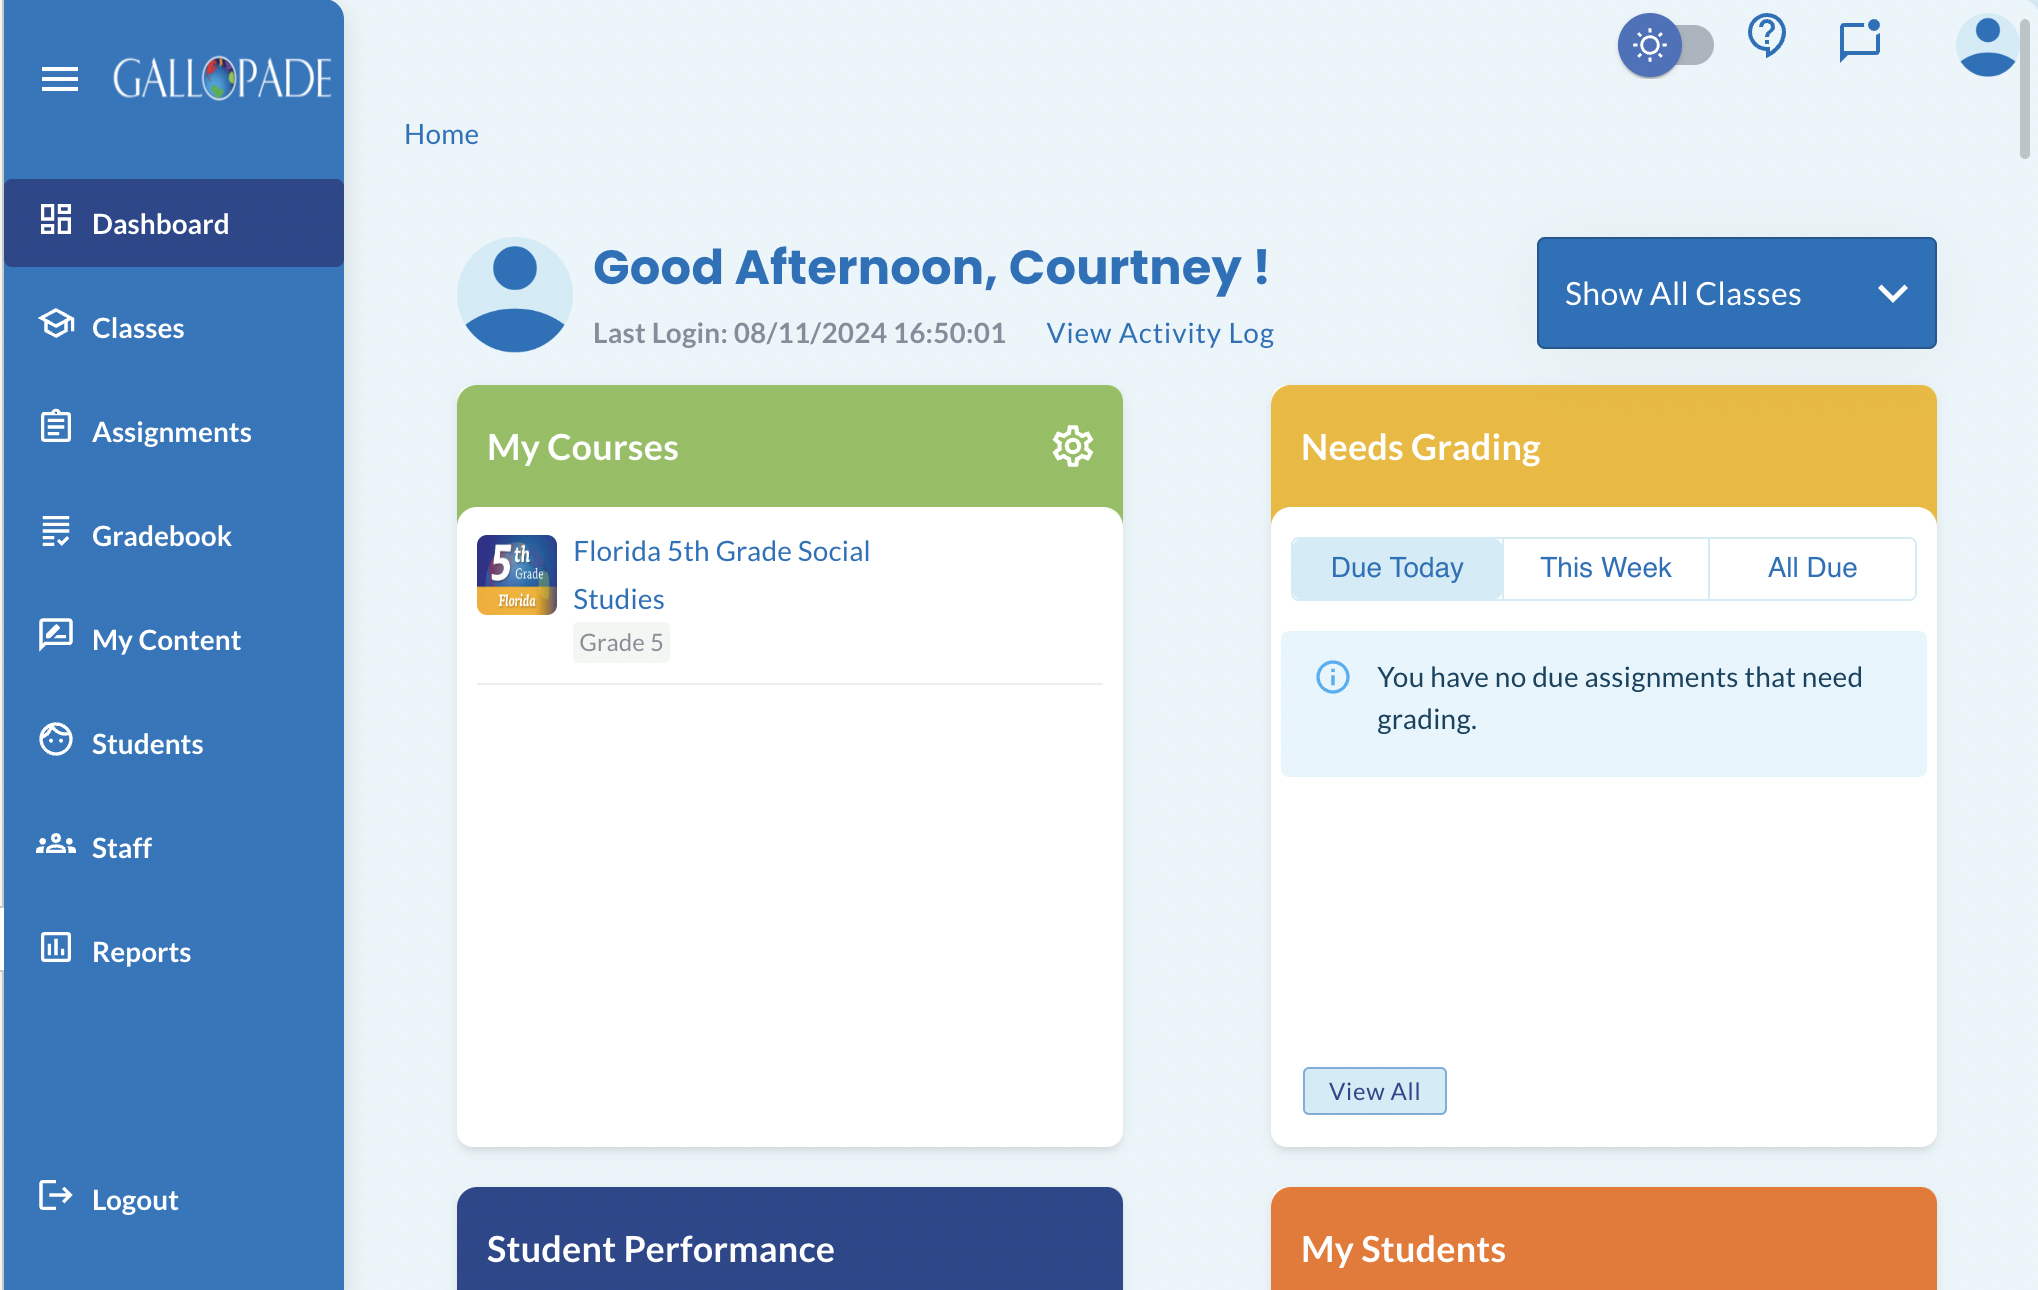
After completing this process for each course, you'll be able to create assignments within Canvas or Schoology using the External Tool Option.
